 If you’ve been following our Dos and Don’ts of DIY series, you’re already familiar with the importance of saying, “Honey, Don’t!” in any home renovation project. Hopefully, you’ve had the chance to practice some smart shopping strategies, too.
Now, on to the good stuff—the actual, hands-on, down-and-dirty side of DIY. Of course, we have a few “dos” and “don’ts” to follow in this stage of the project, too. For example…
Do – Try to expand your DIY skills. You might discover that you’re really good at finishing drywall or laying tile, saving you the hassle and expense of hiring a contractor to do the job for you.
On our bathroom renovation, my husband asked me to finish the drywall so we could move the project forward. (Normally, I handle the painting and he does just about everything else.) Turns out, I’m pretty good at finishing drywall. (Spreading drywall compound with a trowel is a lot like frosting a cake. Who knew?)
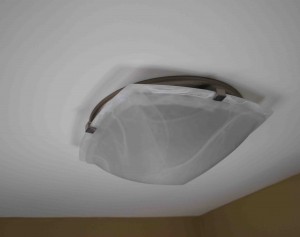
Do – Be ready to adjust the project to match your skill set. I practiced my newfound drywall finishing skill on the ceiling, where we replaced an ugly light fixture and inefficient exhaust vent with a single fixture, leaving a large hole in the ceiling that had to be patched.
 At first, I tried mimicking the Spanish lace pattern from the rest of the ceiling on the patched area. After a couple of tries by hand and a couple more tries with a special tool, I was ready to face the truth: I am not good at creating a Spanish lace textured finish. Solution: I adjusted the project, creating a smooth drywall finish over the entire ceiling. It wasn’t part of the original plan, but we ended up liking this finish even more. It enhanced the clean, simple lines for the entire project. Even better, we got the job done!
Don’t – Try any new skill without doing a little research first. Another new skill I developed on this bathroom remodel was laying tile. Again, to move the project forward while hubby was at work, I installed the subway tile around the tub and the hexagonal floor tiles. Before I started, I talked to the folks in the tile department at our home improvement store and read a few do-it-yourself articles about tile, learning the tricks of the trade from the pros.
 I was so terrified that I would mess up the project, ruining all the hard work we had accomplished so far, that I spent two hours watching do-it-yourself videos of someone else installing and grouting tile before I even picked up the rubber grout float! The extra time learning how to do the project paid off; we were both pleased with the end results.
Note: This post may contain affiliate links. Please see my disclosure policy for more details. And thanks for stopping by!


Where did you find the light fixture for your bathroom ceiling? It looks great and I am looking for something with the square shape.
The light fixture is also an exhaust fan, and it was made by Broan. You might be able to find it at Lowe’s or Menards, if you have one near you. Another alternative is Amazon. If you have an Amazon Prime account, you can get free shipping. We’ve really enjoyed it. Good luck!
Note: Tiling goes faster as a two-person job: one laying the tile and one making necessary measurements and cuts. On this project, while I grouted the tile on my own, I should note that hubby and I tackled tile laying together. (He had the much harder job of cutting the tiny squares and hexagons to fit the space!)