
I first tried this no-knead bread at my brother’s house. His mother-in-law brought it to a family gathering, and it was one of the first platters emptied. Nothing but crumbs! Of course, we all wanted the recipe, and now I’m sharing it with you.
I should note that this recipe is a bit time-intensive toward the end of the process, so wait until you have an afternoon at home before you give it a try. This is also a plan-ahead bread recipe, since you need to start the rising process the night before you plan to serve it. That said, it really isn’t hard to make, and if you typically have trouble with yeast breads, this is a great recipe to take for a test-run.
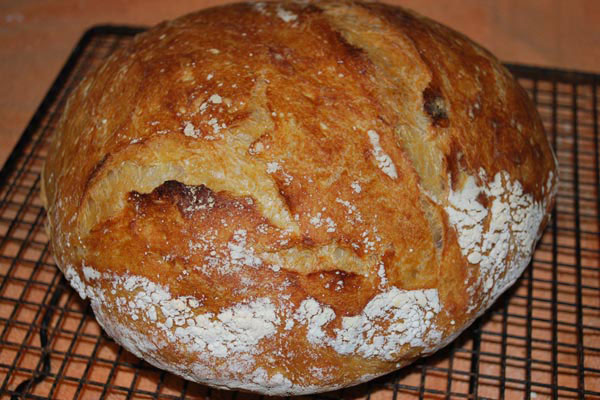
When you do bake this no-knead bread, I think you’ll find that it’s the perfect blend of a crispy outer crust with a warm, soft middle. In fact, this is one of my husband’s favorite bread recipes, and, like the first loaf of no-knead bread I ever tasted, it never lasts long at my house!
I particularly enjoy this bread when I’m serving soup, especially my creamy ham soup or spicy ham & black bean soup. (Oh boy, my mouth is watering just thinking about it!) This month, I’ll be baking this no-knead bread to serve alongside broccoli soup, which we’ll be eating next Wednesday.
Note: This recipe first appeared in the New York Times, here.
Ingredients:
3 cups flour (or bread flour), plus more for dusting
¼ tsp. instant yeast
1 ¼ tsp. salt
Instructions:
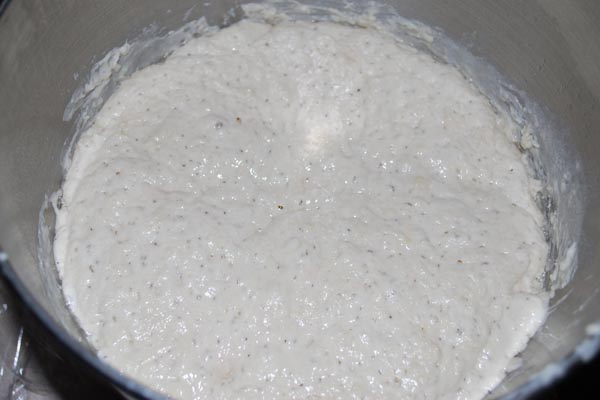
1. In a large bowl, combine flour, yeast, and salt. Add 1 5/8 cups water. Stir until blended. Dough will be quite sticky and somewhat shaggy. Cover bowl with plastic wrap and let it rest at least 12 hours, preferably 18 hours, at warm room temperature. Dough is ready when its surface is dotted with bubbles.
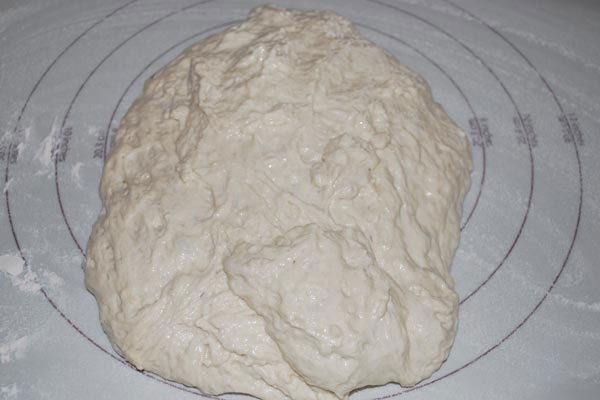
2. Lightly flour a work surface and dump dough from the bowl. (I use my pastry mat, which is just right for this purpose!). Sprinkle the dough with flour and fold it over on itself once or twice. Cover loosely with plastic wrap and let it rest about 15 minutes.
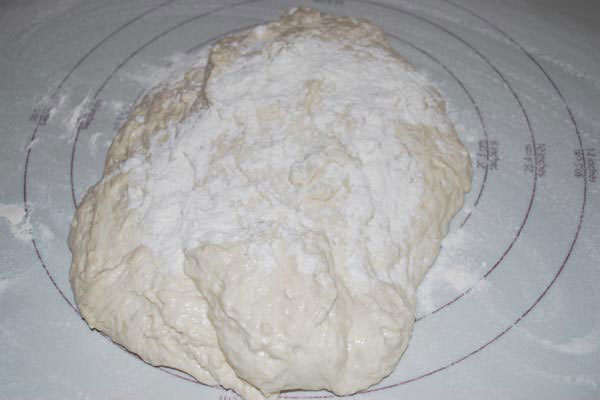
3. Using just enough flour to keep the dough from sticking to your work surface, gently and quickly shape the dough into a ball. Generously coat a cotton towel (no terry cloth) with flour. Place dough seam-side down on towel and dust with more flour. Cover with another cotton towel and let it rise for 2 more hours. Dough will be more than double in size and won’t readily spring back when you poke it with your finger.
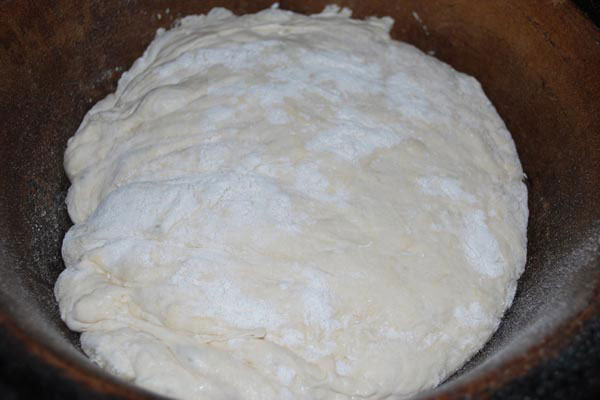
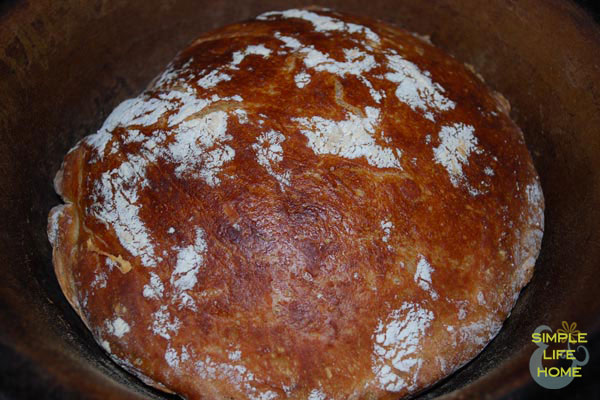
4. At least half an hour before dough is ready, heat oven to 450 degrees. Put a 6- to 8-quart heavy covered pot (cast iron, enamel, Pyrex, or ceramic…I used my stoneware bowl) in the oven as it heats. When dough is ready, carefully remove the pot from the oven. Slide your hand under the towel and turn the dough over into the pot, seam side up. It might look like a mess, but that’s okay. Shake pot once or twice to evenly distribute dough, if necessary.
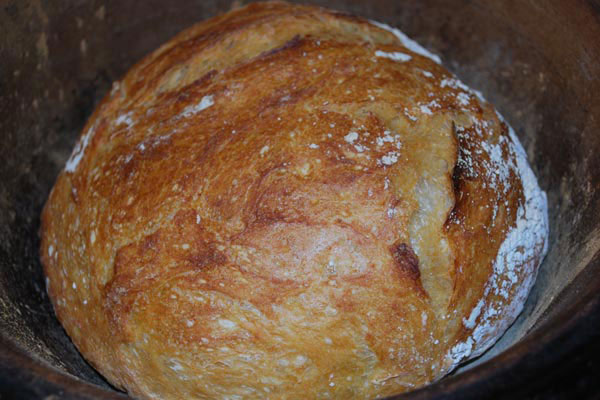
5. Cover pot (or, in my case, bowl) with lid and bake 30 minutes, then remove lid and bake another 15 to 30 minutes (did I not tell you it was time-intensive at the end?). Crust will be a beautiful brown when it’s done. Remove the loaf from the pot and let it cool on a rack. (This is an important step, because the bread will be piping hot!)
6. Cut up bread and serve with olive oil, butter, or your favorite berry preserve. Delicious!
Here’s the printable version:
- 3 cups flour (or bread flour), plus more for dusting
- ¼ tsp. instant yeast
- 1 ¼ tsp. salt
- In a large bowl, combine flour, yeast, and salt. Add 1⅝ cups water. Stir until blended. Dough will be quite sticky and somewhat shaggy. Cover bowl with plastic wrap and let it rest at least 12 hours, preferably 18 hours, at warm room temperature. Dough is ready when its surface is dotted with bubbles.
- Lightly flour a work surface and dump dough from the bowl. (I use my pastry mat, which is just right for this purpose!). Sprinkle the dough with flour and fold it over on itself once or twice. Cover loosely with plastic wrap and let it rest about 15 minutes.
- Using just enough flour to keep the dough from sticking to your work surface, gently and quickly shape the dough into a ball. Generously coat a cotton towel (no terry cloth) with flour. Place dough seam-side down on towel and dust with more flour. Cover with another cotton towel and let it rise for 2 more hours. Dough will be more than double in size and won’t readily spring back when you poke it with your finger.
- At least half an hour before dough is ready, heat oven to 450 degrees. Put a 6- to 8-quart heavy covered pot (cast iron, enamel, Pyrex, or ceramic…I used my stoneware bowl) in the oven as it heats. When dough is ready, carefully remove the pot from the oven. Slide your hand under the towel and turn the dough over into the pot, seam side up. It might look like a mess, but that’s okay. Shake pot once or twice to evenly distribute dough, if necessary.
- Cover pot (or, in my case, bowl) with lid and bake 30 minutes, then remove lid and bake another 15 to 30 minutes (did I not tell you it was time-intensive at the end?). Crust will be a beautiful brown when it’s done. Remove loaf from pot and let it cool on a rack. (This is an important step, because the bread will be piping hot!)
- Cut up bread and serve with olive oil, butter, or your favorite berry preserve. Delicious!
Note: This post may contain affiliate links. To learn more, see my disclosure policy. And thanks for stopping by!